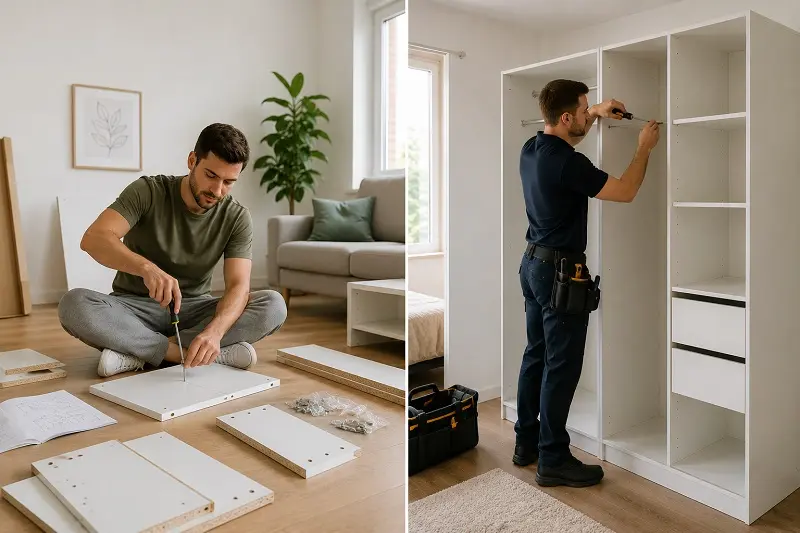
You just bought a new bookshelf or maybe a wardrobe. The box arrives. You open it. And suddenly there are 40 pieces, a tiny instruction sheet, and a bag full of screws you’ve never seen before.
Sound familiar?
Most people feel overwhelmed the first time they try to assemble furniture. And honestly, that’s completely normal. Flat pack furniture — the kind you buy from IKEA, Wayfair, or any home store — looks simple on the outside. But once you open that box, things can get confusing fast.
The good news? Furniture assembly isn’t as hard as it looks. You just need a clear process, the right tools, and a little patience.
This guide walks you through how to assemble furniture step by step, from setting up your workspace to tightening the final screw. Whether you’re a complete beginner or someone who just wants fewer mistakes, this is the right place to start.
Things To Do Before Assembling Furniture
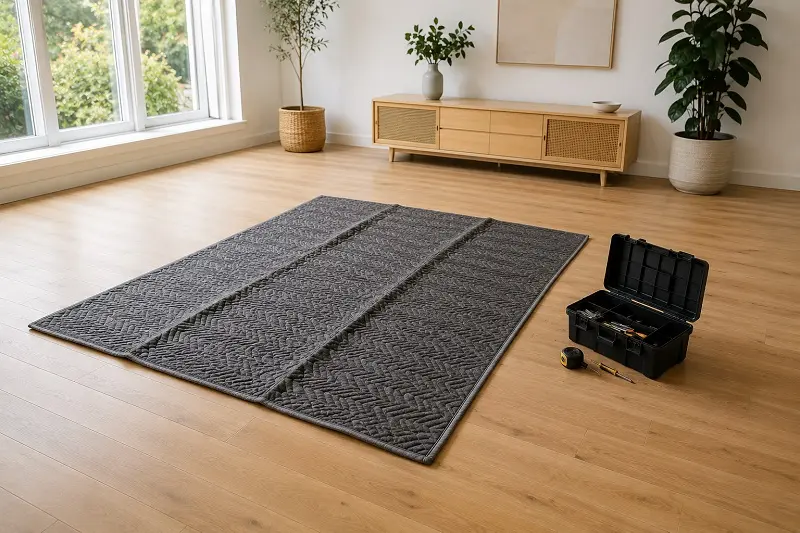
Before you open any bags or touch any panels, a little prep goes a long way. Most assembly mistakes happen not during the build, but before it even starts.
Choose The Right Assembly Area
Pick a room that gives you enough space to lay everything out flat. A living room floor or a garage works great. Avoid small rooms or hallways where you’ll be bumping into walls every few minutes. You need room to spread out.
Check The Floor Space
Think about the size of the finished furniture. A king-size bed frame, for example, takes up a lot more floor space than you’d think. Make sure you have enough room to actually move around the piece while building it.
Keep Children And Pets Away
This one really matters. Small screws and bolts are a choking hazard. Sharp panel edges can hurt little hands and paws. Keep kids and pets in another room until everything is done and secure.
Protect Flooring From Scratches
Dragging panels across hardwood or tile floors will leave scratches. Lay down a blanket, a few cardboard sheets from the box, or an old rug. It protects the floor and gives your furniture pieces a soft surface to rest on.
Tools Needed For Furniture Assembly
Having the right tools on hand before you start saves a ton of frustration. Nothing is worse than stopping mid-assembly to hunt for a screwdriver.
Basic Tools For Most Furniture
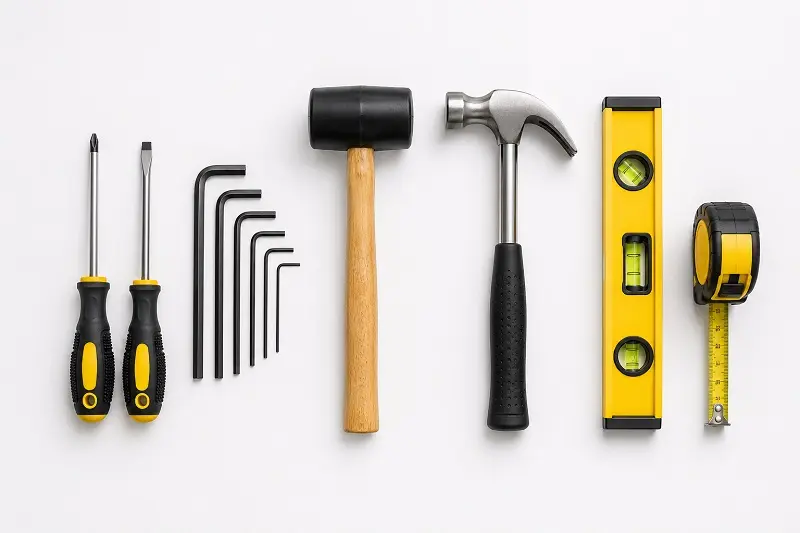
These are the tools you’ll use most often:
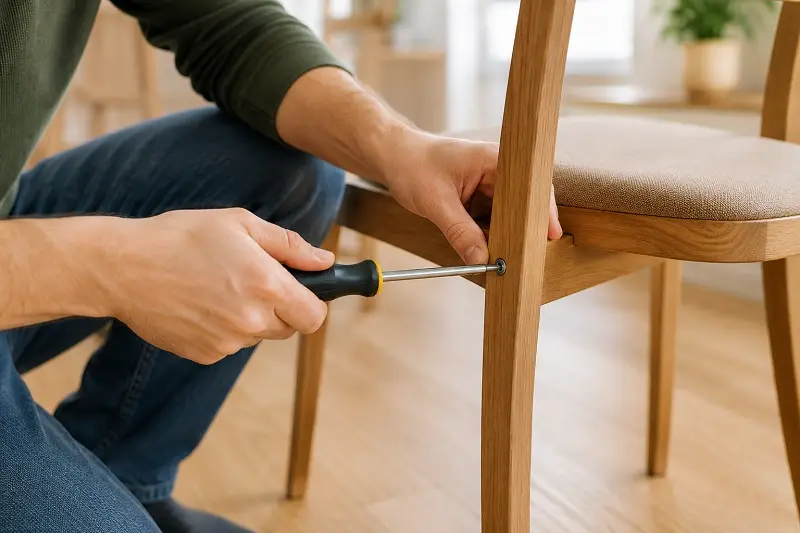
Screwdriver — Both flathead and Phillips head. Most furniture uses Phillips screws, but keep both handy.
Hammer — For tapping wooden dowels into place gently. Don’t go too hard.
Allen Key (Hex Key) — Almost every flat pack furniture set comes with one, but having your own set in multiple sizes is smarter. The included ones bend easily.
Drill — A cordless drill with screwdriver bits makes the job much faster, especially for large wardrobes or bed frames with lots of screws.
Measuring Tape — Helpful for checking that panels are straight and evenly spaced.
Rubber Mallet — Softer than a hammer, great for pressing parts together without damaging the surface.
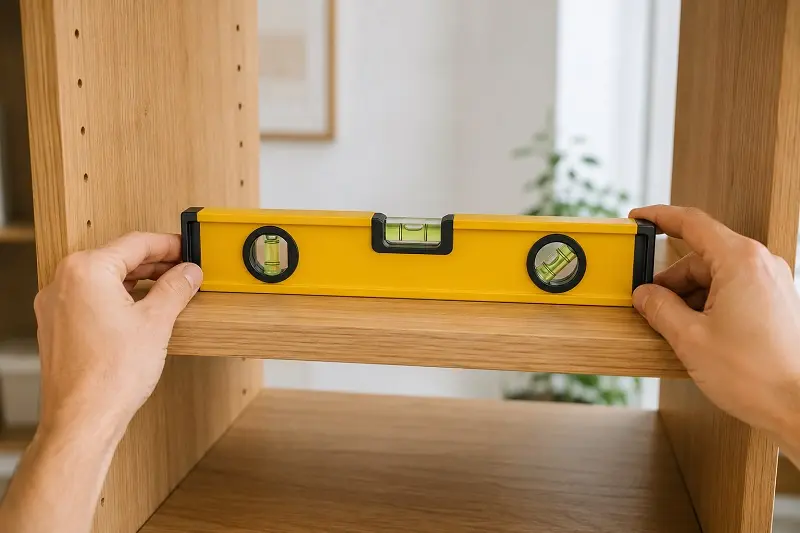
Spirit Level — Makes sure shelves are straight, and the whole unit isn’t leaning to one side.
Optional Tools That Make Assembly Faster
A power drill with a torque setting is a game-changer. It lets you tighten screws without stripping them. Magnetic screw holders keep small screws from rolling away. A headlamp is surprisingly useful when you’re working under a desk or inside a dark cabinet. And cable ties help you manage any cords during desk or TV unit assembly.
Safety Equipment To Use
Don’t skip this part. Wear safety glasses if you’re using a drill — small wood chips do fly. Gloves help with heavy panels that have rough edges. Non-slip shoes are smart too, especially when moving large pieces of furniture around.
Read The Instructions Properly Before Starting

This sounds obvious. But most people glance at the instructions, assume they understand, and then get halfway through before realizing they put something in backwards. Take 10 minutes to actually read before you build.
Understand The Parts List
Every instruction booklet starts with a parts list. It shows every piece you should have — panels labeled A, B, C, screws labeled S1, S2, and so on. Go through this list and check that everything is actually in the box before you start. This takes five minutes and saves a lot of headaches later.
Learn Furniture Symbols And Labels
Furniture instructions use symbols instead of words. A circle with a cross means a screw hole. An arrow often shows direction. Numbers in circles show the step order. Spend a moment learning what each symbol means. IKEA and most other brands are fairly consistent with these.
Check Missing Hardware Before Assembly
Find every bag of hardware — screws, bolts, dowels, cam locks. Count them against the parts list. If something is missing, contact the store or manufacturer now. It’s much worse to discover a missing bolt on step 17 than on step 1.
Organize Furniture Parts And Hardware
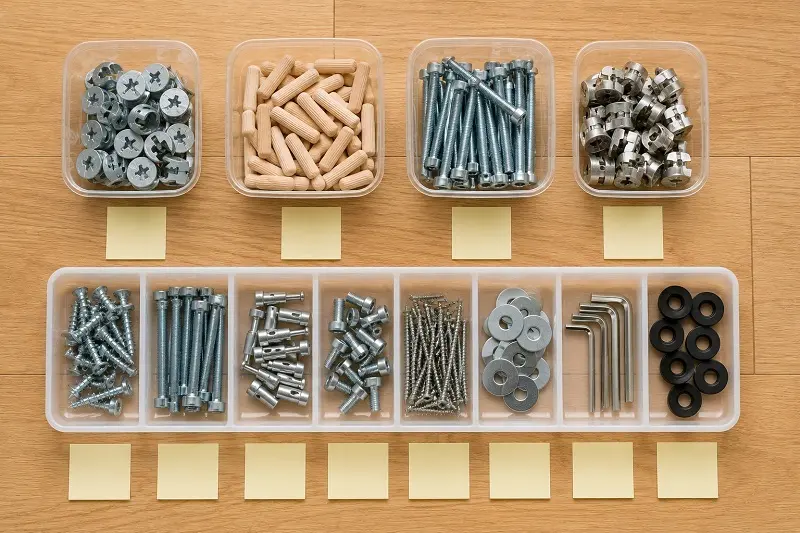
A messy workspace creates assembly mistakes. Organize everything first.
Separate Screws And Bolts
Open every bag and group similar items together. Keep M6 bolts separate from M4 bolts. Keep cam locks in their own pile. A muffin tin or small bowls work perfectly for this. Egg cartons are also great if you have one handy.
Arrange Panels In Order
Lay out all the panels flat and label them lightly with a sticky note if the markings are hard to read. Put them in the order you’ll need them — bottom panel first, sides next, top last. This means less hunting around mid-assembly.
Keep Small Parts In Containers
Use small cups, bowls, or a sectioned toolbox for tiny pieces. Cam locks, washers, and small screws love to disappear under sofas and rugs. Keeping them contained saves time and your sanity.
Step-by-Step Process To Assemble Furniture
Now the actual building begins. Follow these steps in order, and you’ll avoid the most common mistakes.
Step 1: Prepare The Workspace
Clear the area completely. Lay down your protective covering. Have your tools within reach. Set the instruction sheet somewhere you can see it clearly without bending over. Good lighting matters — turn on a lamp if the room feels dim.
Step 2: Identify Every Furniture Part
Before connecting anything, pick up each piece and find its label. Most panels have small stickers or engraved letters. Match each one to the instruction diagram. This takes a few minutes but prevents the classic mistake of building the left side where the right side should go.
Step 3: Assemble The Main Frame
Always start with the main structure — the base, the sides, or the back panel. Don’t skip ahead to shelves or drawers. Think of it like building a house: foundation first, details later. Connect the main pieces loosely at first. Don’t fully tighten anything yet. This keeps things flexible for adjustment.
Step 4: Tighten Screws Carefully
Once the main frame looks right, go back and tighten screws — but gently. Finger tight, then a quarter turn more. Over-tightening strips the wood or the screw hole and makes the joint weak. Use your spirit level here to check that the frame is straight before locking everything in.
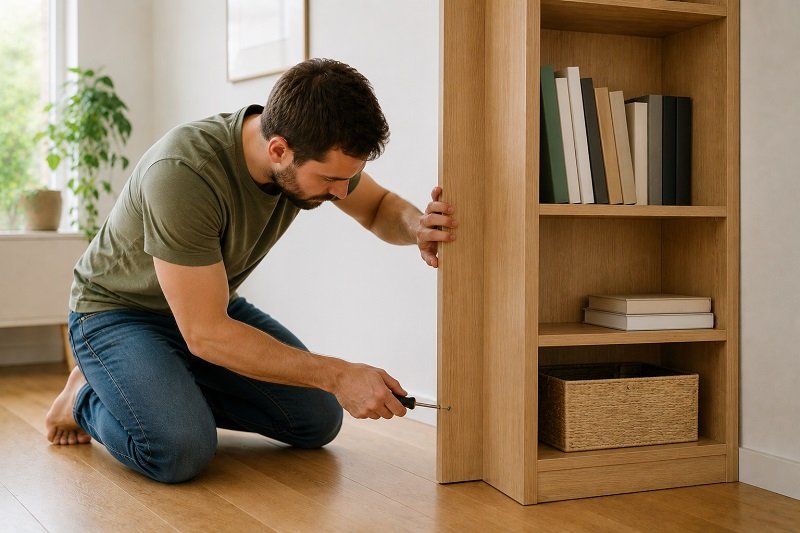
Step 5: Attach Shelves, Drawers, or Doors
Now add the interior parts. For shelves, make sure they’re at the same height on both sides before securing. For drawers, slide them in slowly and check that they run smoothly. For doors, attach the hinges loosely first, hang the door, then adjust before fully tightening.
Step 6: Check Alignment And Balance
Step back and look at the whole piece. Is it straight? Are the gaps between doors even? Does it wobble when you press gently on the top corner? This is the time to fix small issues. Slightly loosen a joint, adjust the panel, and re-tighten.
Step 7: Secure The Furniture Properly
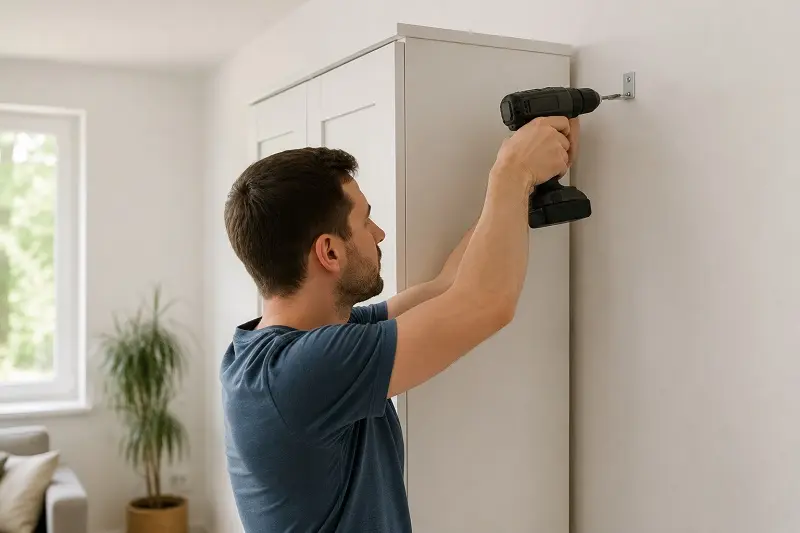
For tall furniture — wardrobes, bookshelves, cabinets — attach the wall bracket if one is included. This is not optional. A fully loaded bookshelf can tip forward and cause serious injury. Anchor it to a wall stud using the appropriate screws. Check the instruction sheet for where to attach.
How To Assemble Flat Pack Furniture Easily
Flat pack furniture is designed to be built by one person with basic tools. But it does come with its own quirks.
Common Flat Pack Furniture Problems
The most common issues are: cam locks that don’t click properly, dowels that don’t fully seat, panels installed upside down, and pre-drilled holes that don’t align properly. Almost all of these happen when you rush or skip steps.
Tips To Save Time During Assembly
Lay out all parts before starting. Group hardware by type. Use a drill instead of a screwdriver. Ask someone to hold panels while you connect them. And start with the biggest, heaviest piece of the frame — it gives everything else a reference point.
Best Way To Avoid Wrong Assembly
Follow the instruction numbers in strict order. Never jump to step 12 when you’re on step 7. If something doesn’t seem to fit, don’t force it — check whether you have the right part or whether it’s facing the right direction. Most misalignments are just a flipped panel.
Furniture Assembly Tips For Beginners
If this is your first time building furniture, start smart.
Start With Small Furniture
Don’t try to build a five-door wardrobe on your first attempt. Start with a small bookshelf, a bedside table, or a simple desk. These usually have fewer than 30 parts and teach you the basics without overwhelming you.
Avoid Rushing The Process
Set aside more time than you think you need. A small desk might take 45 minutes. A wardrobe might take 2-3 hours. Rushing leads to skipped steps, wrong placements, and stripped screws. Put on some music and enjoy the process.
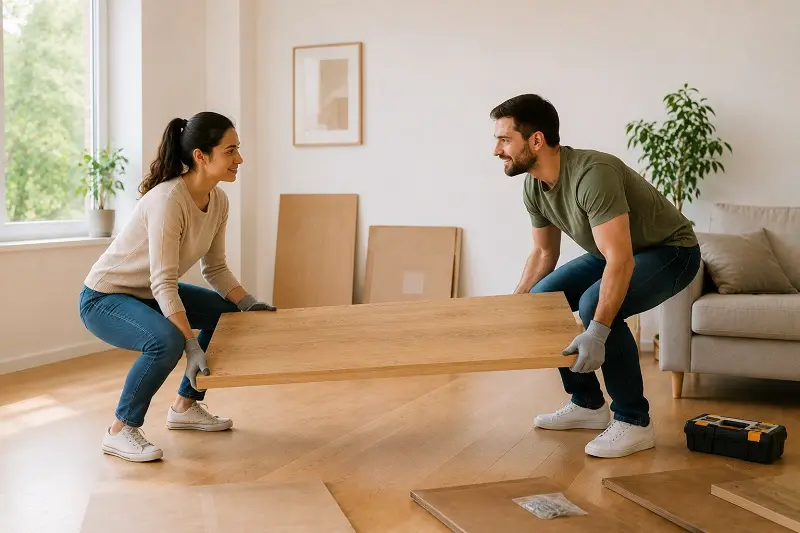
Work With Another Person
Having a second set of hands makes a huge difference. One person holds the panel upright while the other inserts the screws. It’s faster, safer, and much less frustrating. Ask a friend or family member to help, especially for large items.
Take Photos During Assembly
Before you attach a panel or insert a shelf, take a quick photo with your phone. If you ever need to disassemble and rebuild — during a move, for example — those photos are worth their weight in gold. You’ll know exactly how every piece should look.
Common Furniture Assembly Mistakes
Even experienced people make these. Knowing them in advance helps you avoid them.
Over-Tightening Screws
This is the most common mistake. It feels like tighter equals stronger. But overtightening strips the thread in soft wood or chipboard. You end up with a loose screw that can’t grip anything. Always stop when you feel resistance — not before and not after.
Skipping Instructions
People skip the manual because they think they can figure it out. And sometimes they can — until they’re three steps from done and realize they inserted the back panel before attaching the drawer rails. Follow the steps. Every single one.
Mixing Similar Looking Parts
Many furniture sets have parts that look almost identical but are slightly different — a left rail and a right rail, or a longer and shorter screw of similar size. Group and label everything before you start. If two pieces look the same, check the measurements.
Using Wrong Tools
Using a knife instead of a Phillips screwdriver or a flathead on a hex bolt damages both the tool and the hardware. Use the right tool for each job. It’s that simple.
Ignoring Weight Limits
Every piece of furniture has a stated weight limit. A shelf rated for 15 kg will sag or snap if you load it with 25 kg of books. Check the specs in the instruction manual and respect them.
How To Fix Furniture Assembly Problems
Things go wrong sometimes. Here’s how to handle the most common issues.
Furniture Feels Wobbly
First, check whether all screws are fully tightened. Then check whether the back panel is properly secured — a missing or loose back panel causes almost every wobble. If the floor is uneven, use small furniture pads or shims under the legs.
Drawer Does Not Slide Properly
Remove the drawer and look at the rails inside. Are they at the same height on both sides? Are any screws sticking out? Loosen the rail screws slightly, adjust to level, and re-tighten. A tiny bit of candle wax or furniture lubricant on the rail can also smooth things out.
Doors Are Uneven
Cabinet and wardrobe hinges are adjustable. You’ll usually find a small Phillips screw on the hinge that lets you move the door left, right, up, or down. Adjust these while the door is closed to get even gaps all around.
Missing Hardware Pieces
Don’t panic. Check the box thoroughly — small bags hide in corners and under cardboard. If something is genuinely missing, most manufacturers offer free replacement hardware. Contact their customer service with your product code. IKEA, for example, replaces missing parts at no charge.
Wrong Part Installed
If you realize you’ve put in the wrong piece, don’t force the rest of the build forward. Disassemble back to that step and correct it. It takes time, but it’s better than a finished piece that doesn’t work properly or looks off.
Safety Tips During Furniture Assembly
Furniture assembly is usually safe, but there are some real risks to be aware of.
Lifting Heavy Furniture Safely
Large panels, especially solid wood pieces, can be very heavy. Bend at the knees, not the waist. Keep your back straight. Ask someone to help with anything over 20 kg. Never try to muscle a heavy wardrobe panel into position alone — back injuries are not worth it.
Prevent Wall Tip Overs
Tall furniture must be anchored to the wall. Children can climb shelves, and heavy furniture can tip with very little force. Use the included wall brackets and drive screws into wall studs, not just drywall. A stud finder makes this easy.
Electrical Safety With Power Tools
If you’re using a drill, keep cords untangled and out of the way. Don’t drill near electrical outlets or water pipes in walls. Work in a dry area. Keep the drill off when you’re not actively using it.
Safe Assembly For Large Wardrobes
Large wardrobes should always be built with a partner. The side panels need to be held while the top is attached, and this is nearly impossible solo. Don’t try to stand up a completed wardrobe alone — tip it from lying flat to upright with someone helping on each side.
Estimated Furniture Assembly Time
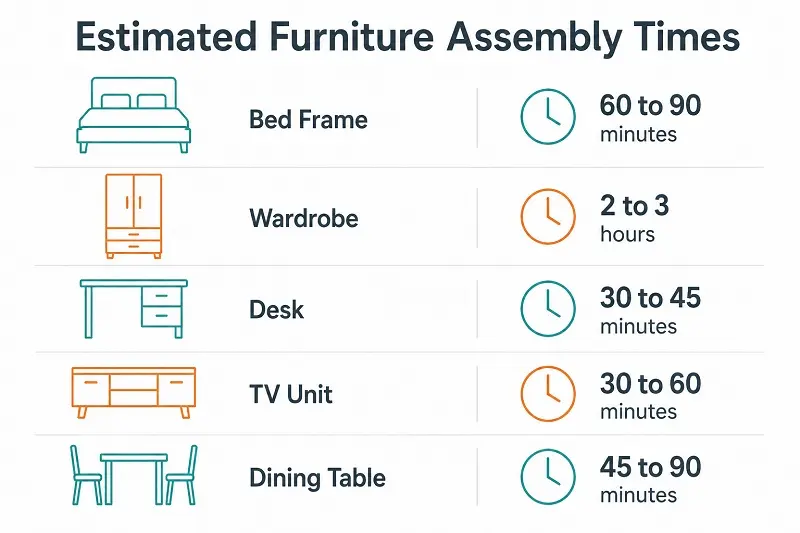
Wondering how long it’ll take? Here are realistic estimates for an average person working at a steady pace.
Bed Frame Assembly Time
A single or double bed frame with a slatted base typically takes 60 to 90 minutes. A king-size platform bed with a storage base can take 2 to 3 hours.
Wardrobe Assembly Time
A basic two-door wardrobe takes about 2 hours. A large combination wardrobe with shelves, rails, and multiple sections can take 3 to 5 hours, especially solo.
Desk Assembly Time
A simple writing desk takes 30 to 45 minutes. An L-shaped office desk with cable management and drawers can take 1.5 to 2 hours.
TV Unit Assembly Time
A basic TV stand takes 30 to 60 minutes. A full media unit with doors and adjustable shelves can take 1 to 2 hours.
Dining Table Assembly Time
Most dining tables take 45 to 90 minutes, depending on the number of legs and how the apron attaches. Chair assembly adds about 10 minutes per chair.
Different Types Of Furniture That Need Assembly
Not all furniture comes ready to use. Here’s a quick look at what typically requires building.
Beds
Bed frames almost always come in flat-pack form. The headboard, footboard, side rails, and slats all need to be connected. Some beds also have under-bed storage drawers that need their own assembly.
Wardrobes
These are the most complex pieces. They have many panels, hanging rails, shelves, and doors — all of which need to line up correctly.
Cabinets
Kitchen cabinets, bathroom cabinets, and storage units usually come flat-packed. They’re generally simpler than wardrobes but still require careful part identification.
Office Furniture
Desks, shelving units, filing cabinets, and monitor stands all need assembly. Office furniture often comes with cable management features that add extra steps.
Shelves And Bookcases
One of the easiest categories. A basic bookshelf from IKEA, like the KALLAX or BILLY series, can be assembled by one person in under an hour.
Outdoor Furniture
Garden chairs, patio tables, and outdoor storage boxes often come in parts. Outdoor furniture typically uses bolts and nuts rather than cam locks, so you’ll need a spanner or wrench in addition to a screwdriver.
DIY Furniture Assembly Vs Professional Assembly
Should you build it yourself or hire someone?
Benefits Of DIY Assembly
It saves money — professional assembly usually costs between £30 and £100 per item in the UK, or $50 to $150 in the US. It also gives you a real understanding of how the furniture is built, which helps when repairs are needed later. And honestly, there’s a satisfying feeling when you finish.
When Professional Help Is Better
Some furniture is genuinely complex — large modular wardrobes, wall-mounted systems, or items with electrical features like adjustable desks. If you don’t have the tools, the time, or a second person to help, hiring a professional is a smart choice. It reduces the risk of injury and poor assembly.
Cost Difference Between DIY And Professional Service
On average, DIY assembly costs nothing beyond your time and any tools you may need to buy. Professional services typically charge per piece or per hour. For a large wardrobe, you might pay £80 to £150 for a professional. For a simple desk, closer to £40 to £60. Many furniture retailers like IKEA and John Lewis offer their own paid assembly services at transparent prices.
How To Maintain Furniture After Assembly
Assembly is just the beginning. Good maintenance keeps furniture sturdy and looking great for years.
Re-tighten Screws Regularly
Over time, the screws in flat pack furniture loosen — especially on chairs, beds, and anything that gets regular movement. Every six months, do a quick check and tighten any screws that have worked loose. It takes five minutes and extends the furniture’s life significantly.
Protect Furniture From Moisture
Chipboard and MDF — the materials used in most flat pack furniture — are not waterproof. Even a small amount of moisture can cause swelling and warping. Use coasters, keep furniture away from damp walls, and wipe up spills immediately.
Check Stability Every Few Months
Give your tall furniture a gentle push from the top corner every few months. If it moves more than it should, re-check the wall anchor and all the main joints. This is especially important for bookshelves and wardrobes in homes with children.
When To Call A Furniture Assembly Expert
There are times when DIY really isn’t the right choice.
Large Or Complex Furniture
A modular wardrobe system with eight sections, or a custom-built Murphy bed, can have 200+ parts and require precise alignment. If the instructions run to 50+ pages and you’ve never built furniture before, this isn’t the place to start.
Wall-Mounted Furniture
Floating shelves, wall-mounted cabinets, and TV mounting brackets require you to drill into walls correctly. Hit the wrong spot, and you could damage pipes, wiring, or studs. A professional knows how to locate safe drilling spots and will ensure the mount is secure.
Furniture With Electrical Features
Sit-stand desks, beds with USB charging ports, or cabinets with built-in lighting involve electrical connections. These should always be handled by someone with the right knowledge.
Lack Of Tools Or Time
If you don’t own a drill, a spirit level, or any basic tools, the cost of buying them for a one-time job might equal the cost of hiring help. Factor in your time, too. A professional can assemble a wardrobe in 90 minutes that might take you four hours.
Conclusion
Assembling furniture step by step really isn’t as scary as it looks. Once you lay out the parts, read the instructions properly, and follow the process in order, everything starts to make sense.
The biggest mistake most people make is rushing. They skip a step, force a part that doesn’t fit, or overtighten a screw — and then wonder why the finished piece wobbles or looks off. Slow down, and the whole thing goes smoother than you’d expect.
Start with your workspace. Get your tools ready. Sort your parts. Then build from the bottom up. That simple approach works for almost every piece of furniture — from a basic bedside table to a full-sized wardrobe.
If something goes wrong, don’t panic. Almost every assembly problem has a fix — a loose screw here, an adjusted hinge there. Nothing is permanent until you decide it is.
And if a piece is genuinely too big or too complex to tackle alone, there’s no shame in calling a professional. What matters is that the furniture ends up safe, stable, and in the right room.
Now close this tab, open that box, and get building. You’ve got everything you need to do it right.